Description
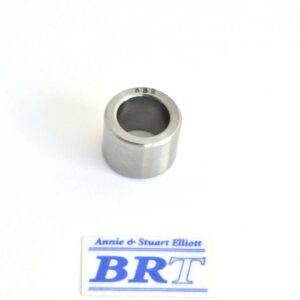
The Accu-Ring is a sizing/seater die lock-ring which provides reference marks in increments of thousandths of an inch (0.001”).
- Sizing die (primary use) – Designed mainly for sizing dies like Full Length, Bushing Bump and body bump type dies. The Accu-Ring helps you zero in when making those trial and error type of adjustments to setup your resizing die. The resizing dies should be set correctly to achieve a very small shoulder bump (shoulder compression) and this measurement needs to relate to what you take from your fired cases before resizing them. So by using proper cartridge headspace measuring tools together with this Accu-ring on the FL dies you can combine to make those adjustments a little easier to achieve.
- Seater die (secondary use) – The Accu-Ring also allows you to make fine adjustments to bullet seating depths (for standard, non micrometer seater dies particularly).
- This lock ring should fit all types of dies with the standard 7/8x 14 tpi threads.
Notice: The distance of 0.001” is the distance between a long and short reference mark as shown in Figure 1. This distance indicates the up or down adjustment of the die in the Co-Ax® Reloading Press. Actual up or down movement of the die is 0.000998” per reference mark, which, for all intents and purposes, is one thousandth of an inch (0.001”).
BRT team Tips:
For easiest use of this graduated locking ring, I set the die in the reloading press to lightly contact the shell holder or Shell Plate (press ram all the way up). Then temporarily lock up the cross-bolt on the ring at this position. I use a fine point marker pen (Texta, Sharpie etc) to run a vertical line up the threads of the die at the position of the join in the lock ring. This is my starting reference point.
Then I take a measurements of a couple of the fired cases together with an appropriate cartridge headspace measuring tool (eg: Forster Datum Dial, LE Wilson Case gauge, Hornady headspace kit etc). You need to know this measurement as it should be the cartridge headspace reading to the fired cases coming from the chamber in your barrel. Maybe twice fired is more certain of real headspace result as sometimes first firing does not completely expand out the shoulder.
The final die position (determined mostly by the lock ring) is therefore going to be a custom setup to match the fired cases you are reloading again for YOUR same rifle. If they were to go into a different chamber (different rifle) this would be different thing for sure.
By the way, when taking this headspace measuring job on the fired cases, double check that a catered primer still in the case is not impacting your measurements! A cratered primer can contact the caliper blade well before the Case head and give you a false measurement overall. Best to remove the spent primers first if you have a tool (Check the Harvey Deprimer tool).
Once that cartridge headspace measurement is recorded we need to start resizing a case and measuring the results of the resizing. This is a trial and error system of die adjustment as there is no other way.
So lube and resize a case and measure headspace. If no shoulder bump has occurred with the case at this primary die setting, this is where you need to loosen the cross-bolt lock ring and wind down the die and try again. Probably move the lock ring position up the die (wind up) only 2 graduations. That is not very much rotation. If you are going to move you need a reference mark and this is why I use a Texta marker line on the threads as mentioned above.
Lock up the Accu-bolt lockring again, lube the case and resize. Measure the headspace of this case yet again. Keep adjusting down as required. The small increment adjustments should ensure that you do not accidentally overdo things. It can mean the die is set so that the ram on the press has to actually ‘cam over’ heavily. This is common. Any quality reloading press can handle this. This is the trial and error method of getting the adjustment correct for the cases fired in YOUR rifle. Eventually you will be able to achieve the setting of a -0.002″ (0.06mm) shoulder bump (or at least somewhere in between -0.001 to 0.003″). If you go too far, simply place that case aside, back off the accu-ring setting and do another case, measure its result and confirm a new shoulder bump. This Accu-ring simply gives you the reference lines which help you move the position on the die each time that you adjust.
Note: When doing the above it is not uncommon to find at one point of this trial & error resizing and checking of the headspace reading you may see the shoulder actually grows longer! (like +.002″ or more). If you have not experienced this yet it will seem odd. But what is happening is your die setting will be approaching the position it needs to be but is not quite yet touching the case shoulder. But because the case body is being squeezed on the sides, the shoulder will move up a little because it can. This is another reason why you need to set the die down just enough to actually compress that shoulder just a little. So don’t panic when you find this, means you are close! Not too far to go.
Once your setup is achieved, leave the lock ring set there! You can remove the marker pen line on the threads with acetone etc if you wish. If you have a case or two accidentally shoulder bumped too far you can fire those cases again and they will obviously fireform again. BUT, if the bump happens to be -0.006″ or more than you will need to be a bit more careful. Before fireforming again some special preparation of any over resized brass will need to be done because this is excessive headspace. It all can be achieved but with knowledge of advanced reloading techniques.
For future reloading sessions remember to use your Headspace measuring tools again to double check the die setting. It should be still correct…but…things can also change. Like brass spring-back because the brass cases harden as fired and resized each time. Don’t be surprised if you need to continue fine tuning the die setting. If you are annealing and doing that properly you probably will not need to be changing die setup. Also remember to use quality case lube (eg: Imperial case wax or Ballistic case wax) and not too much. Variations in lube give you variations in result.